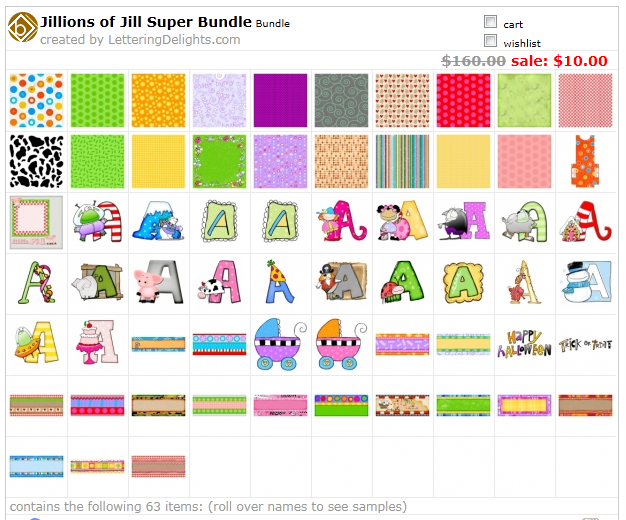
Here's a quick reminder that today is the last day to get your 50 cents Lettering Delights clearanced graphic sets, papers, and alphabets. The sale will end tonight, at midnight (MST). There are a few bundles that are clearanced at an insanely low price. Click here (and scroll down) to check out the bundles or click here to shop the clearance sale (individual sets) before these products are retired from the LD store.


Sunday, July 31, 2011
Friday, July 29, 2011
Friday Freebie! Black Tie Affair graphic set
Hey Everyone! Here's today's Lettering Delights' Facebook Friday Freebie:

Just click here or the image above to go to the LD site, add it to your cart and check out. You pay $0!
There are only 3 more days left before the LD 50-cents clearance sale ends. 50 cents! If you have not shopped the clearance, click here to start shopping and if you already have, click here anyway to take a second look. Once the sale ends on Sunday, these 50cents sets will be retired and gone from the LD site forever. Don't forget that you can use a coupon on these too. (Hint: get it from the email confirmation for "buying" today's freebie!)
Here are some great bundles at insane prices:


Click here now!
Lettering Delights' Try Me Now Tool
Today's post comes from Lettering Delights. This was posted on the LD Facebook page on Thursday but it is such a great explanation of the Try Me Now Tool that I requested to reprint this on my blog for those of you who do not have a Facebook account.
=================================================================
Thursday's Tip: Try Me Now Tool Tutorial
by Lettering Delights
by Lettering Delights

The Try Me Now Tool is designed to help you avoid the hassle of having to download and install all of the products you purchase from LetteringDelights.com. Not only do you have instant access to your products online, but you don't have to use up your valuable hard drive space. Plus, you can copy, save and print images directly from the Try Me Now Tool.
To access the Try Me Now Tool, log into your account on LetteringDelights.com and then click on My Library. Select the type of product you want to use (lettering or graphics) and select a product. On the right side of the product, you will see a box with a wrench in it. This is the Try Me Now Tool.
Use the Try Me Now Tool to create titles instantly (using alphabets or fonts), select a single graphics image from Graphics Sets or Clipart Sets, pick a single doodle image from the DoodleBats set, etc. Plus, you will have access to all of your freebies including the ones received when signing up for our creative newsletter.
Make your first title
For quick and easy titles, simply
1) select an alphabet from your library,
2) type a title (you can make it larger or smaller by changing the resolution),
3) save to your hard drive.
Your title will be saved as a PNG file (or .jpg if you are using an older alphabet). The title will be saved with the name you put in an underscore and then the name You can then open the title in a variety of programs to print or add to digital designs.
If you don't see an product to fit your project in your library, visit our huge selection of alphabets, graphics sets, fonts, etc. for sale. You can instantly add more products to your library.

Print your title or image
You can print the title or image directly from the Try Me now Tool, or you can open the saved image and print from another program. You can use a word processor, desktop publishing or graphics programs or incorporate into digital page designs.
You can print the title or image directly from the Try Me now Tool, or you can open the saved image and print from another program. You can use a word processor, desktop publishing or graphics programs or incorporate into digital page designs.

To print your title or image, click on the "Print Now" tab located underneath your image preview inside the Try Me Now Tool. From here, you can select your print options such as image size and position, page layout and paper size. You can also print from any program that supports images. Open your program, create a blank document, insert the title, and click Print. Many of our customers use Microsoft Word to print their titles; see below for more information about printing from Word.
To print from Microsoft Word
Open a blank document. Select Insert, Insert Picture from File, and browse to find the location of your title image. Click OK. Click Print to send the title to your printer.

Change the size
You can preview and save titles in three different sizes to fit your project: small, medium or large. Each size will deliver a crisp image at the saved size. The title will be saved as a high quality PNG file.
To resize a title in many programs, including Word, click on the title to select it; when the corners appear around the image, hold down the left mouse button and drag the mouse to resize the title.

To size the image to exact dimensions, right click on the image, select Size, and enter your required size in inches. You can always size down a title in a word processing or graphics program, but we do not recommend sizing up a title because image quality will decrease.
Graphics programs such as Photoshop also allow you to enter the exact pixel dimensions to resize the title image.
Can I copy and paste titles to another program?
You can right-click on the title you created, select Copy and then Paste it into another program (with Internet Explorer there is a Copy button). However, we recommend saving instead. For Windows users, copying a transparent alphabet will use the Windows clipboard, which will remove the transparency and replace it with a white background. You can keep transparency by saving the products as a PNG image and then opening it in another program.
What does "transparent" mean?
Transparent alphabets have no white background around the letters and the graphics have no white background around the images. They can, for example, be put on top of a colored background, and that background will show up right behind each letter. Preserve the transparency of your titles by saving them as PNGs. Transparency allows you maximum creative freedom to layer your titles.
Nontransparent alphabets and graphics have a white background, which is evident when layered on top of a colored background. Our more recent alphabets and graphics are transparent. Our older alphabets and graphics, however, were offered as JPGS, which do not support transparency.
How is an alphabet different from a font?
Fonts are only black and white; they can be changed to a single color in some programs (such as Word). Lettering Delights alphabets are images rather than fonts. In a Lettering Delights alphabet, each letter is a full-color illustration or image. Without the restrictions of font files, our artists can design alphabets in an endless variety of themes, from flowers to holiday ornaments to soccer balls and more.
To type with alphabets, use the Try Me Now Tool or install them into the Creative Delights Companion.
Can I change the color of an alphabet or graphics image?
You cannot change the colors in the Try Me Now Tool or in a word processing program. You can however, modify colors in Photoshop or similar programs.
Can I change the color of a font?
Yes you can, but only the black portion of the font. Inside the Try Me Now Tool, click on the color pallet to the right of the title you typed. Select a color and click on the Select button (bottom left). The color should be applied to your font. Hint, using thick black fonts works best to see the change of color.

Create vertical titles
You can create a vertical title by typing and saving each letter separately and then lining them up vertically in Word or the program of your choice. Or, you can download the Creative Delights Companion program.
Mix and match products
You can only use one product at a time in the Try Me Now Tool. As with creating vertical titles, you can, however, type and save each letter separately or select a single graphic image and then arrange them in order in Word or another program.
Rotate titles and images
From a word processing, desktop publishing or graphics program, you can rotate your titles and images. For example, in Microsoft Word, click on the title to select it, and click on the circle that appears above the middle of the title. A circular arrow will appear. Hold the left mouse button down and drag to rotate the title image.
Thursday, July 28, 2011
Zoku 1, 2, 3, 4!

Today's post is so not about Lettering Delights or Make-the-Cut but I had so much fun with what I did I just had to share it with you.
Hubby has had his eyes on this Zoku Quick Pop Maker since last summer but I had told him that we had no use for it so we never bought it. When my friends kept talking about it, I caved and came home with one last Friday.
I've made homemade ice-cream before so this device doesn't intimidate me. In fact, it looks kinda cute. The concept is simple: Freeze the unit for 24 hours, prepare your ingredients, pour it into the cavities and watch it freeze. The ice pops are supposed to be ready in about 10 mins. And so, I excitedly cleaned the Zoku, put it in the freezer and waited for time to pass.
I thought about all the fantastic ice pops that I could make with this device but a search on the Zoku blog turned up only a handful of recipes. Perhaps I should have gotten the Zoku Quick Pops Recipe Book when I saw it at the store but since I didn't, the internet was the only resource that I could turn to. A few minutes of online searching and I was prepared to just go with the flow and make a super simple ice pop.

See this funky looking fruit? It's called Lychee and is very popular amongst Asians. We also like the canned version and use it often in our drinks and desserts.

My smarty-pants hubby and kids thought that it'll be neat to make a lychee popsicle from the canned stuff. I thought "What the heck, why not?!" and so we started playing.

First, I halved a couple of lychees.

Next we took the frozen Zoku Quick Pop Maker out of the freezer.

I used the fruit wand to stick a piece of fruit to the side of each cavity.

Put the popsicle sticks in and pour the juice.

Set the timer for 10 mins and watch the popsicle freeze.

2 mins in and we could already see the big freeze happening.

A couple minutes more and I could see the kids drool.

*Ding!* goes the timer but are the popsicles really ready?

Oh yeah!

Perfect lychee ice pops!

My kids couldn't have whined harder when I didn't give them the ice pops as soon as I got them out of the Zoku.
"Wait a min, babies! Mommy has to take pictures first."
"Awwwwww......*whine* *whine* *whine*" x3.
With Hubby's help I actually took that picture in lightning speed. Stereo whining never fails to get us working faster.

Since the unit is supposed to be able to make three batches of ice pops before it needs to go back into the freezer, I let Hubby have a go at it for the second batch. He made ice pops from his Pineapple Orange juice. LOL!

So we've got one more batch to make this round. What's good as an ice pop?
What's that sitting on the counter?
I spy something pink and yummy.......
I spy something pink and yummy.......

I just had to give that a shot!

Tada!
Honestly, I think we took too long making the first and second batches so this third batch took a lot longer than 10 mins to freeze. Besides, it has alcohol content and while it was freezing, it was also bubbling so that the resulting ice pops was pretty slushy-like. Still, I've never enjoyed Mike's Hard Lemonade more than I did that night.

There is a Taiwanese restaurant in town that we go to often. The kids really love their Mango-Strawberry ice dessert. When we had dinner there last weekend, the kids were inspired by their dessert and asked if we could use the Zoku to make some strawberry-mango ice pops.

And we did!
For the strawberry portion, we pureed fresh strawberries with sugar and water, and we did the same for the mango part. The resulting Straw-Go ice pop is so yummy it instantly became our favorite popsicle.
For the strawberry portion, we pureed fresh strawberries with sugar and water, and we did the same for the mango part. The resulting Straw-Go ice pop is so yummy it instantly became our favorite popsicle.
And so with that, we've reached the end of today's special non-LD or MTC post. We'll go back to regular programming tomorrow.
*slurp*

-------
This post was linked to Skip To My Lou- Made by You Monday (Aug 2).
*slurp*

-------
This post was linked to Skip To My Lou- Made by You Monday (Aug 2).
Wednesday, July 27, 2011
My vacation giveaway WINNERS!
Thanks everyone for playing in my "Where in the World is Jin Yong?" Giveaways. I'm sorry that I'm late posting the winners (Blame Andy for distracting me with that v.3.3.2! :-p )but they have been picked and I'm excited to announce them. I had so much fun putting up those vacation banners for all of you! We enjoyed our Southern California vacation so much I was so sad to come home.
On our first full day in CA, we brought the kids to Disneyland. My hubby took the picture for the banner when we were waiting in line for the It's A Small World ride.

The next day, we brought the girls to Sea World in San Diego. We got to feed the dolphins but our favorite part of the day was watching the Shamu show. In fact, we liked that so much, we watched it twice!

We also visited California Adventures...

...and stopped by Universal Studio as we made our way to Santa Barbara. By the way, for those of you who asked, I did let my hubby and kids go inside that cake stand store with me. ;-)

On Monday, we went to the San Diego Zoo. My girls loved it but our very favorite part was that we got to see a real live panda!

Most of you got the answers right but since this giveaway is all for fun, it didn't matter if your answer was wrong, your entries were still counted. :-)
Now, are you ready for the winners?
..........drum roll.........
All the winners were picked by random.org and they are ....
Giveaway 1: JessicaL


Giveaway 2: teachdanz


Giveaway 3: Martha


Giveaway 4: Cathy


Giveaway 5: Cynthia


Congratulations, JessicaL, teachdanz, Martha, Cathy, and Cynthia! You have each won a $5 Lettering Delights gift certificate! Please contact me to claim your prize.
Thanks for playing, everyone!
Subscribe to:
Posts
(
Atom
)